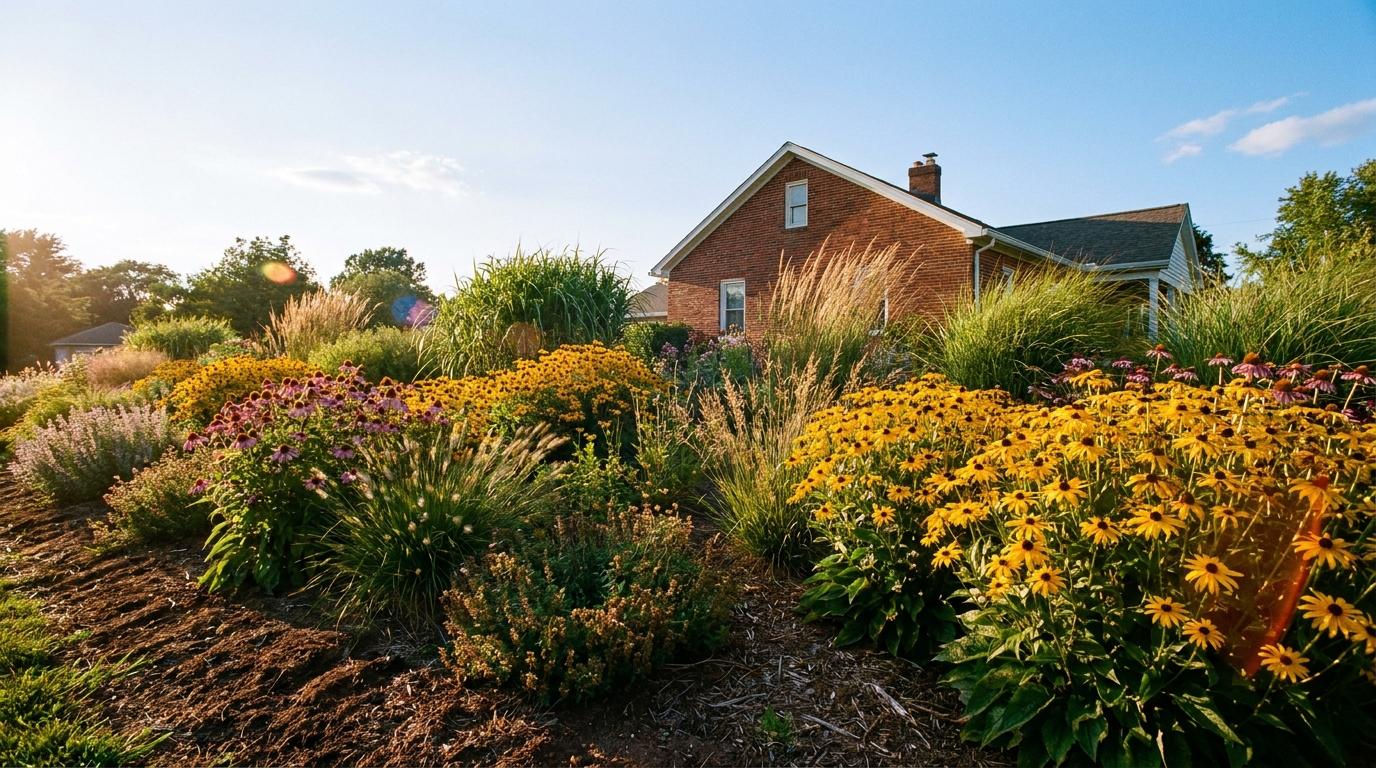
The success of your spring planting depends largely on the groundwork you do before putting plants in the ground. Proper bed preparation creates the foundation for healthy root development, efficient water management, and vigorous growth. Rushing this step—or skipping it entirely—sets plants up for struggle regardless of how much you care for them afterward.
This guide walks you through the complete process of preparing garden beds for spring planting in Fort Wayne, from soil testing to final bed shaping. Whether you’re creating new beds or revitalizing existing ones, these steps ensure your plants have the best possible start.

When Should You Start Preparing Garden Beds in Spring?
Begin preparing garden beds in Fort Wayne 2-4 weeks before your intended planting date, typically starting in early to mid-April when soil is workable but not waterlogged. Soil is ready to work when you can squeeze a handful and it crumbles rather than forming a sticky ball. Never work wet soil—compaction damage lasts for years.
Spring Bed Preparation Timeline
| Task | Timing | Notes |
|---|---|---|
| Soil testing | 4-6 weeks before planting | Allows time for results and amendments |
| Remove debris/weeds | 3-4 weeks before | Clear the area |
| Add amendments | 2-3 weeks before | Let amendments incorporate |
| Final preparation | 1 week before | Shape and finish beds |
| Planting | After last frost (April 26 avg) | Or earlier for hardy plants |
Testing Soil Readiness
The squeeze test:
- Grab a handful of soil
- Squeeze firmly
- Open hand
- If it crumbles: Ready to work
- If it stays in a ball: Too wet, wait
Signs it’s too early:
- Soil squishes underfoot
- Water pools on surface
- Soil sticks to tools
- Ground still frozen below surface
What Soil Testing Should You Do Before Planting?
A professional soil test reveals pH levels, nutrient content, and organic matter percentage, telling you exactly what amendments your Fort Wayne garden beds need. The modest cost ($15-30) prevents wasted money on unnecessary products and ensures you’re addressing actual deficiencies rather than guessing.
What Soil Tests Measure
| Factor | What It Tells You | Ideal Range |
|---|---|---|
| pH | Soil acidity/alkalinity | 6.0-7.0 for most plants |
| Nitrogen (N) | Available plant food | Varies by crop |
| Phosphorus (P) | Root and flower development | 25-50 ppm |
| Potassium (K) | Overall plant health | 100-200 ppm |
| Organic Matter | Soil life and structure | 3-5% |
How to Test
Purdue Extension:
- Cost: $15-20
- Results: 2-3 weeks
- Includes recommendations
DIY Test Kits:
- Cost: $10-30
- Results: Immediate
- Less accurate, good for pH
Common Fort Wayne Soil Issues
| Issue | Sign | Solution |
|---|---|---|
| Clay soil | Heavy, slow draining | Add organic matter |
| Compaction | Hard, won’t absorb water | Aerate, add compost |
| Low pH | Acidic (below 6.0) | Add lime |
| Low organic matter | Poor structure | Add compost |

How Do You Improve Garden Bed Soil?
Improving garden bed soil centers on adding organic matter—compost, aged manure, or leaf mold—which improves drainage in clay soils, increases water retention in sandy soils, adds nutrients, and supports beneficial soil organisms. For most Fort Wayne beds, adding 2-4 inches of compost and incorporating it 6-8 inches deep transforms soil quality dramatically.
Soil Amendment Guide
| Amendment | Benefits | Application Rate |
|---|---|---|
| Compost | Improves all soil types | 2-4 inches, work in |
| Aged manure | Adds nutrients, organic matter | 1-2 inches, work in |
| Leaf mold | Improves structure | 2-3 inches, work in |
| Peat moss | Increases acidity, retention | 1-2 inches for acid lovers |
| Lime | Raises pH | Per soil test |
| Sulfur | Lowers pH | Per soil test |
Step-by-Step Soil Improvement
- Remove existing vegetation - Weeds, old plants, debris
- Add amendments - Spread evenly across surface
- Incorporate - Work into top 6-8 inches
- Level and shape - Create final bed form
- Let settle - Wait 1-2 weeks before planting
Specific Soil Challenges
Heavy clay (common in Fort Wayne):
- Add compost liberally
- Consider raised beds
- Avoid tilling when wet
- Gypsum can help break up clay
Compacted soil:
- Double-dig or deeply cultivate
- Add organic matter
- Consider core aeration
- Add mulch to prevent re-compaction
How Do You Create New Garden Beds?
Creating new garden beds requires removing existing vegetation, defining bed edges, improving soil, and establishing the final grade. The method depends on your timeline—sod removal is fastest, smothering takes months but requires less effort, and each has its place depending on your planting schedule.
Bed Creation Methods
| Method | Time Needed | Effort | Best For |
|---|---|---|---|
| Sod removal | Immediate | High | Fast installation |
| Smothering | 3-6 months | Low | Planning ahead |
| Solarization | 4-8 weeks | Medium | Weed-heavy areas |
| Raised beds | Immediate | Medium | Poor soil, drainage |
Step-by-Step Sod Removal
- Mark bed outline - Hose or spray paint
- Cut edges - Flat spade or edger
- Slice sod - 2-3 inch strips
- Roll and remove - Compost or use elsewhere
- Improve soil - Add amendments
- Shape bed - Final grading
Smothering Method (No-Dig)
- Mow area short
- Cover with cardboard - Overlap edges
- Add 4-6 inches compost/mulch
- Wait 3-6 months - Vegetation decomposes
- Plant through decomposed layer
Bed Edge Options
| Edge Type | Maintenance | Cost | Look |
|---|---|---|---|
| Natural (cut edge) | High - regular edging | Free | Traditional |
| Steel edging | Low | Medium | Modern |
| Plastic edging | Low | Low | Functional |
| Stone/brick | Very low | High | Formal |

What Tools Do You Need for Bed Preparation?
Essential bed preparation tools include a spade, garden fork, iron rake, wheelbarrow, and work gloves, with optional power equipment like a rototiller for large areas. Quality tools make the work easier and last for decades; cheap tools bend, break, and make bed preparation frustrating.
Essential Tools
| Tool | Use | Features to Look For |
|---|---|---|
| Spade | Digging, edging | Flat blade, solid handle |
| Garden fork | Loosening, incorporating | Strong tines |
| Iron rake | Leveling, debris removal | Heavy-duty head |
| Wheelbarrow | Moving materials | Solid construction |
| Gloves | Hand protection | Fitted, durable |
| Tarp | Moving debris | Convenient dragging |
Power Equipment Options
For large areas:
- Rototiller - Turns soil quickly (rental available)
- Power edger - Clean bed lines
- Skid steer - Major renovation (hire professional)
Tool Care Tips
- Clean after each use
- Store dry
- Sharpen spades and edgers
- Oil wooden handles
How Do You Refresh Existing Garden Beds?
Refreshing existing garden beds involves removing weeds, cutting back dead growth, dividing overgrown plants, replenishing mulch, and adding compost to maintain soil health. Annual spring refresh keeps beds looking good and plants thriving without the effort of complete renovation.
Spring Refresh Steps
- Remove debris - Leaves, dead stems, winter damage
- Pull weeds - Before they seed, roots and all
- Cut back perennials - Dead growth from last year
- Edge beds - Clean, defined lines
- Divide if needed - Overgrown plants
- Add compost - 1 inch topdressing
- Mulch - Replenish to 2-3 inches
When to Cut Back Perennials
| Plant Type | When to Cut |
|---|---|
| Most perennials | Early spring before new growth |
| Ornamental grasses | Late winter/early spring |
| Lavender, sage | After danger of hard frost |
| Early bloomers | After flowering |
Dividing Overgrown Plants
Signs plants need dividing:
- Dead center
- Reduced flowering
- Crowded, floppy growth
- Spreading beyond bounds
How to divide:
- Dig entire plant
- Separate into sections
- Replant at proper spacing
- Water well

What’s the Best Mulching Strategy for New Beds?
After planting, apply 2-3 inches of organic mulch (hardwood, bark, or leaf mulch) to new garden beds, keeping mulch a few inches away from plant stems to prevent rot. Mulch suppresses weeds, retains moisture, moderates soil temperature, and gradually improves soil as it decomposes.
Mulch Types for Garden Beds
| Type | Longevity | Best Use | Notes |
|---|---|---|---|
| Hardwood mulch | 1-2 years | General beds | Most common |
| Cedar/cypress | 2-3 years | Perennial beds | Longer lasting |
| Leaf mulch | 1 year | Naturalistic | Free if you have trees |
| Shredded bark | 1-2 years | Slopes | Stays in place |
Mulching Best Practices
Do:
- Apply 2-3 inches depth
- Keep 2-3 inches from stems
- Mulch after planting
- Replenish as needed
Don’t:
- Pile mulch against stems (rot)
- Apply over wet weeds (they grow through)
- Use too deep (blocks air, water)
- Use before amending soil
When Can You Start Planting After Bed Preparation?
Wait 1-2 weeks after bed preparation before planting to allow amendments to incorporate and soil to settle. Hardy plants (pansies, perennials, shrubs) can go in earlier, while tender annuals must wait until after the last frost date (around April 26 in Fort Wayne).
Fort Wayne Planting Calendar
| Plant Type | Earliest Planting |
|---|---|
| Trees and shrubs | Early April |
| Hardy perennials | Mid-April |
| Pansies, violas | Early April |
| Tender annuals | Early May (after frost) |
| Tropical plants | Mid-May |
Signs Beds Are Ready
- Soil crumbles when squeezed
- No standing water after rain
- Amendments incorporated
- Bed surface leveled
Need help preparing garden beds for spring? Our landscaping services include bed creation, renovation, and planting.

Start Your Spring Planting Right
Proper bed preparation sets the stage for successful planting. Take time now to test soil, add amendments, and create healthy growing conditions—your plants will reward you with vigorous growth and beautiful blooms.
Request a Free Quote or call us at (260) 450-4676 to discuss garden bed preparation and planting services.
Frequently Asked Questions
How deep should I prepare garden bed soil?
Work soil to 6-8 inches deep for most plants. Deeper preparation (12+ inches) benefits plants with deep roots like tomatoes. For trees and shrubs, ensure the planting hole is wide rather than deep.
Can I plant immediately after adding amendments?
Wait 1-2 weeks after adding amendments, especially raw materials like manure. This allows amendments to begin incorporating and prevents burning tender roots. Compost can be used more immediately.
Should I till or not till my garden bed?
Tilling breaks up compacted soil but can destroy soil structure if overdone. For new beds in compacted soil, tilling once is helpful. For established beds, avoid tilling—add compost on top instead.
How do I know if my soil drains well enough?
Dig a 12-inch deep hole, fill with water, and let drain. Refill and time drainage. If the second fill drains within 1-4 hours, drainage is good. Faster indicates sandy soil; slower indicates drainage problems.
What’s the best compost for garden beds?
Well-aged compost that’s dark, crumbly, and earthy-smelling works best. Avoid compost that smells bad or contains recognizable materials. Homemade, municipal, or commercial bagged compost all work well.
Sources
- Purdue Extension - Garden Soil Preparation
- University of Illinois Extension - Starting a Garden
- Penn State Extension - Soil Basics
Related Articles
- Native Indiana Plants That Thrive in Fort Wayne Gardens
- Mulch Types Compared: Which is Best for Your Garden?
Adam Minnick is the owner of Minnick Lawn & Landscaping, serving Fort Wayne, Auburn, and Northeast Indiana since 2018.
